How to Clean a Bee Hive: A Comprehensive Guide for Beekeepers
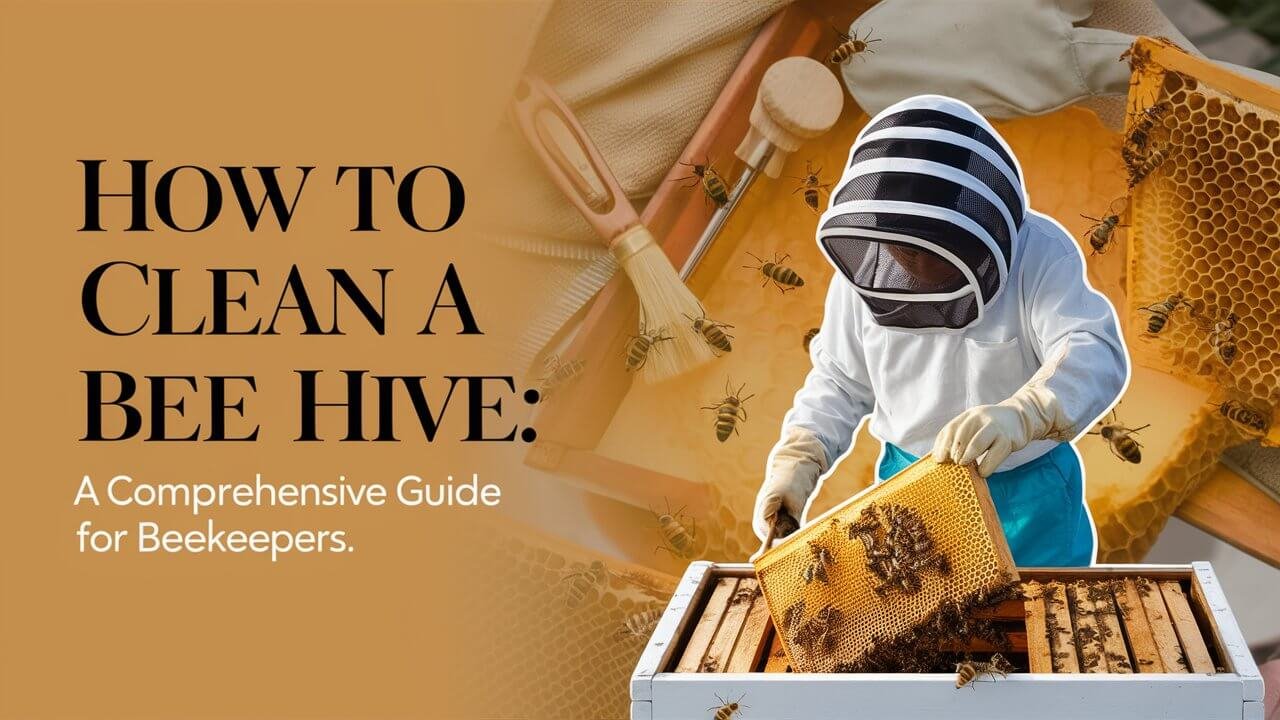
Cleaning a bee hive is a crucial task for every beekeeper. It helps maintain the health of your bee colony, prevents the spread of diseases, and extends the lifespan of your equipment. This guide will walk you through the process of how to clean a bee hive effectively, covering everything from preparation to execution and maintenance.
Why Cleaning Your Bee Hive is Essential
Before we dive into the nitty-gritty of hive cleaning, let’s understand why it’s so important.
Maintaining Bee Health
A clean hive is a healthy hive. Bees are susceptible to various diseases and pests, and a dirty hive can become a breeding ground for these problems. Regular cleaning helps remove potential sources of infection and infestation, keeping your bees healthy and productive.
Preventing Disease Spread
Diseases like American Foulbrood (AFB) and European Foulbrood (EFB) can devastate entire colonies. These pathogens can linger in dirty hives, spreading to new bees and even other colonies. Proper cleaning and disinfection are key to preventing the spread of these diseases.
Extending Equipment Lifespan
Beekeeping equipment isn’t cheap. Regular cleaning and maintenance can significantly extend the life of your hives, frames, and tools. This not only saves you money in the long run but also ensures your equipment remains in top condition for your bees.
When to Clean Your Bee Hive
Knowing when to clean your bee hive is just as important as knowing how to clean it.
Seasonal Cleaning Schedule
Most beekeepers follow a seasonal cleaning schedule:
- Spring: Perform a thorough cleaning as bees become more active.
- Summer: Regular maintenance and spot cleaning as needed.
- Fall: Another thorough cleaning before winter preparations.
- Winter: Minor cleaning if weather permits, focusing on external parts.
Signs Your Hive Needs Cleaning
Watch for these indicators that your hive needs attention:
- Excessive buildup of propolis or wax
- Signs of pest infestation (e.g., wax moth larvae)
- Mold or mildew growth
- Unusual odors coming from the hive
- Dead bees accumulating on the bottom board
Post-Disease Cleaning
If your hive has experienced a disease outbreak, immediate and thorough cleaning is crucial. This may involve more intensive methods and possibly the destruction of contaminated materials, especially in cases of AFB.
Preparing for Hive Cleaning
Proper preparation is key to effectively cleaning your bee hive.
Safety Gear and Equipment
Before you start, make sure you have the following:
- Bee suit or protective clothing
- Gloves (both beekeeping and cleaning gloves)
- Face mask or respirator
- Eye protection
- Sturdy boots
Tools Needed for Cleaning
Gather these essential tools:
- Hive tool
- Scraper or paint scraper
- Wire brush
- Sponges or cloths
- Bucket for debris
- Blowtorch (optional, for scorching)
Creating a Clean Workspace
Set up a clean area near your hive:
- Lay down a tarp or large piece of cardboard.
- Set up a table for laying out hive parts.
- Have a disposal bin ready for debris.
- Prepare cleaning solutions in advance.
Step-by-Step Guide to Cleaning a Bee Hive
Now, let’s walk through the process of how to clean a bee hive.
Removing and Protecting Bees
- Choose a warm, sunny day for cleaning.
- Use smoke to calm the bees.
- Gently brush bees into a temporary hive or nuc box.
- Move the temporary hive a short distance away.
Disassembling the Hive
- Remove the outer cover and inner cover.
- Take out frames one by one, brushing off any remaining bees.
- Set aside frames with brood or honey for later inspection.
- Remove supers and the bottom board.
Scraping and Removing Debris
- Use your hive tool to scrape off excess wax and propolis.
- Pay special attention to corners and joints.
- Collect debris on your tarp or cardboard for easy disposal.
Cleaning Wooden Components
- Scrub wooden parts with a wire brush to remove stubborn residue.
- Wipe down surfaces with a damp cloth.
- Allow wooden parts to air dry completely.
Handling Frames and Combs
- Inspect frames for damage or disease.
- Scrape off excess wax and propolis.
- Replace any damaged or old frames.
- Consider freezing frames to kill pests like wax moths.
Addressing Wax Moth and Pest Issues
- Look for signs of wax moth infestation (webbing, larvae).
- Remove and destroy heavily infested combs.
- Freeze remaining frames to kill any eggs or larvae.
Cleaning Methods for Bee Hive Components
Different cleaning methods can be used depending on the level of cleaning required and the equipment available.
Scorching Technique
Scorching is an effective way to sterilize wooden hive components:
- Use a propane torch with a focused flame.
- Move the flame slowly over all surfaces, especially corners.
- The wood should turn a light brown color, not black.
- Be careful not to set the wood on fire or cause warping.
Chemical Cleaning Solutions
For thorough disinfection, you can use chemical solutions:
- Prepare a solution of washing soda (1 kg per 5 liters of water).
- Submerge hive parts in the solution for 20 minutes.
- Scrub with a brush to remove residue.
- Rinse thoroughly with clean water.
- Allow to dry completely before use.
Steam Cleaning
Steam cleaning is an eco-friendly option:
- Use a wallpaper steamer or dedicated hive steamer.
- Direct steam into all corners and crevices.
- Steam for at least 5 minutes per hive body.
- Allow components to cool and dry completely.
Freezing Method
Freezing is particularly effective against wax moths and other pests:
- Place frames or small hive components in a freezer.
- Maintain a temperature of -20°C (-4°F) or lower.
- Keep items frozen for at least 48 hours.
- Allow to thaw and dry before reuse.
Cleaning Specific Hive Parts
Different parts of the hive require specific cleaning approaches.
How to Clean Bee Hive Frames
Frames are crucial components that require careful cleaning:
- Remove wax and propolis with a hive tool.
- Soak in a washing soda solution if heavily soiled.
- Gently scrub with a soft brush.
- Rinse thoroughly and allow to dry.
- Consider replacing very old or damaged frames.
Cleaning the Hive Bottom Board
The bottom board collects a lot of debris:
- Scrape off dead bees and debris.
- Wash with soapy water or a mild bleach solution.
- Rinse thoroughly and allow to dry completely.
- Consider scorching wooden bottom boards for extra sanitation.
Sanitizing Hive Tools and Equipment
Don’t forget to clean your tools:
- Scrape off wax and propolis.
- Wash with hot, soapy water.
- For metal tools, you can flame sterilize with a torch.
- Wipe down with a diluted bleach solution for extra sanitation.
Natural and Eco-Friendly Cleaning Options
For beekeepers preferring natural methods, there are eco-friendly alternatives.
Using Vinegar and Essential Oils
Vinegar is a natural disinfectant:
- Mix equal parts water and white vinegar.
- Add a few drops of lemongrass or tea tree essential oil.
- Use this solution to wipe down hive components.
- Allow to air dry completely.
Solar Wax Melters for Cleaning
Solar wax melters can clean frames while harvesting wax:
- Place frames in a solar wax melter.
- The sun’s heat will melt the wax, leaving frames clean.
- Collect the melted wax for other uses.
- Clean the remaining propolis off the frames.
Dealing with Contaminated Hives
Hives affected by serious diseases require special attention.
Cleaning After American Foulbrood
AFB is a severe bacterial disease requiring stringent measures:
- Consult with a bee inspector or local authority.
- In many cases, burning the entire hive is necessary.
- If salvaging is allowed, use a strong bleach solution or gamma irradiation.
- Follow all local regulations regarding AFB treatment.
European Foulbrood Cleanup Procedures
EFB is less severe but still requires thorough cleaning:
- Remove and destroy affected combs.
- Scorch wooden components with a blowtorch.
- Soak small parts in a strong washing soda solution.
- Thoroughly clean all beekeeping equipment used with the hive.
Preventing Future Contamination
Prevention is always better than cure when it comes to hive health.
Regular Maintenance Practices
Implement these practices to keep your hives clean:
- Regularly remove debris from the bottom board.
- Replace a few frames each year with fresh foundation.
- Keep the area around your hives clean and free of weeds.
- Monitor for signs of pests or diseases regularly.
Implementing Hive Hygiene Routines
Develop good habits for hive hygiene:
- Clean your hive tool between inspections of different hives.
- Wear clean protective gear for each apiary visit.
- Quarantine new equipment or bees before introducing them to your apiary.
- Maintain good record-keeping to track hive health and cleaning schedules.
Common Mistakes to Avoid When Cleaning Bee Hives
Being aware of potential pitfalls can help you clean more effectively.
Over-cleaning and Disrupting the Hive
While cleanliness is important, too much intervention can be harmful:
- Don’t clean unnecessarily – only when signs indicate it’s needed.
- Avoid opening the hive in poor weather conditions.
- Respect the bees’ natural cleaning behaviors.
- Don’t remove all propolis, as it has antimicrobial properties.
Using Harmful Chemicals
Be cautious with cleaning products:
- Avoid harsh chemicals that can harm bees.
- Never use pesticides or non-food-grade chemicals inside the hive.
- If using bleach, ensure it’s thoroughly rinsed and dried.
- Be wary of strong scents that might repel bees.
Storing Clean Hive Components
Proper storage is crucial to maintain cleanliness between uses.
Proper Storage Techniques
Follow these tips for storing clean equipment:
- Ensure all components are completely dry before storage.
- Store in a cool, dry place away from direct sunlight.
- Stack boxes with spacers to allow air circulation.
- Use mothballs or para-dichlorobenzene to prevent wax moth infestation.
Protecting Clean Equipment from Pests
Keep your clean equipment safe:
- Store frames in sealed plastic bags or bins.
- Regularly inspect stored equipment for signs of pests.
- Consider using cedar blocks as a natural pest deterrent.
- Rotate stored equipment, using older items first.
Let’s Finish
Cleaning your bee hive is a crucial aspect of responsible beekeeping. By following this comprehensive guide on how to clean a bee hive, you’ll ensure a healthy environment for your bees, prevent the spread of diseases, and maintain your equipment in top condition. Remember, regular cleaning and maintenance not only benefit your bees but also make your beekeeping experience more enjoyable and productive.
FAQs About Cleaning Bee Hives
How often should I clean my bee hive?
The frequency of cleaning depends on various factors, but generally:
- Perform a thorough cleaning at least once a year, typically in early spring.
- Do spot cleaning and maintenance checks every few weeks during the active season.
- Clean immediately if you notice signs of disease or heavy pest infestation.
Can I use bleach to clean my bee hive?
While bleach is an effective disinfectant, it should be used cautiously:
- Use a diluted solution (1 part bleach to 10 parts water).
- Rinse thoroughly and allow to dry completely before reuse.
- Never use bleach on frames or components that will directly contact honey.
What’s the best way to clean wax from hive tools?
To clean wax from hive tools:
- Scrape off excess wax with another tool.
- Heat the tool slightly to melt remaining wax.
- Wipe clean with a cloth or paper towel.
- For thorough cleaning, wash with hot, soapy water.
How do I clean a bee hive without harming the bees?
To clean your hive safely:
- Choose a warm, calm day for cleaning.
- Use smoke to calm the bees and encourage them to move away from areas you’re cleaning.
- Gently brush bees off components you’re removing.
- Work quickly and efficiently to minimize disturbance.
- Avoid using harsh chemicals that might harm the bees.
Is it necessary to clean new hive equipment?
While new equipment is generally clean, it’s good practice to:
- Inspect for any manufacturing residues or debris.
- Lightly sand any rough edges on wooden components.
- Consider applying a food-grade wax or propolis treatment to new wooden ware.
- Allow new equipment to air out before use to dissipate any processing odors.
By following these guidelines and regularly maintaining your hives, you’ll create the best possible environment for your bees to thrive. Remember, a clean hive is a happy hive, and happy bees are productive bees!

