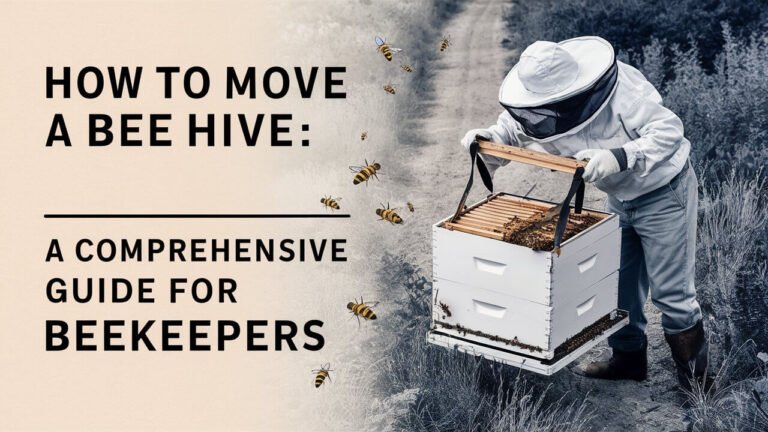
How to Make a Bee Hive: A Complete Guide for Beginner Beekeepers

Are you interested in beekeeping but unsure where to start? Learning how to make a bee hive is an excellent first step into this fascinating world. This comprehensive guide will walk you through the process of building your own bee hive, from selecting materials to setting up your new colony. Whether you’re a novice beekeeper or looking to expand your apiary, this article will provide you with the knowledge and confidence to create a thriving home for your bees.
Introduction to Beekeeping and Hive Construction
Beekeeping is a rewarding hobby that not only provides you with delicious honey but also contributes to the vital role bees play in our ecosystem. Before we dive into the nitty-gritty of hive construction, let’s explore why making your own hive can be beneficial and which type might be best for you.
Why Make Your Own Bee Hive?
Building your own bee hive offers several advantages:
- Cost-effectiveness: DIY hives are often cheaper than store-bought options.
- Customization: You can tailor the hive to your specific needs and preferences.
- Quality control: You have full oversight of the materials and construction process.
- Learning experience: Building a hive deepens your understanding of bee biology and behavior.
- Satisfaction: There’s a unique pride in housing your bees in a hive you’ve crafted yourself.
Types of Bee Hives: Choosing the Right Design
Several hive designs are popular among beekeepers. Here are the most common types:
- Langstroth Hive: The most widely used design, featuring removable frames for easy inspection and honey harvesting.
- Top Bar Hive: A horizontal hive that’s simple to build and manage, ideal for natural beekeeping methods.
- Warre Hive: A vertical hive that mimics the natural habitat of bees, requiring less intervention from the beekeeper.
- Flow Hive: A modern design that allows honey extraction without opening the hive.
For this guide, we’ll focus on building a Langstroth hive, as it’s the most versatile and beginner-friendly option.
Essential Materials and Tools for Building a Bee Hive
Before you start construction, gather all the necessary materials and tools. This preparation will ensure a smooth building process.
Wood Selection and Preparation
Choose weather-resistant wood that’s safe for bees. Good options include:
- Cedar
- Pine
- Cypress
Avoid pressure-treated lumber, as it contains chemicals harmful to bees. Your wood should be:
- Kiln-dried to prevent warping
- Smooth and free of splinters
- At least 3/4 inch thick for insulation
Hardware and Fasteners
You’ll need various hardware items:
- Galvanized nails or screws (1-1/4 to 1-1/2 inches long)
- Wood glue
- Metal brackets (optional, for reinforcement)
- Hinges (for the outer cover)
Protective Gear and Safety Equipment
Safety should always be a priority. Ensure you have:
- Safety goggles
- Work gloves
- Dust mask
- Ear protection (if using power tools)
Essential tools for the job include:
- Saw (hand saw or power saw)
- Hammer or drill
- Measuring tape
- Square
- Sandpaper
- Paint brushes (for finishing)
Step-by-Step Guide to Building a Langstroth Hive
Now that you have your materials ready, let’s walk through the process of building each component of a Langstroth hive.
Constructing the Bottom Board
The bottom board is the foundation of your hive. Here’s how to build it:
- Cut a piece of wood to 22″ x 16-1/4″ for the landing board.
- Cut two side rails at 22″ x 3/4″ x 2″.
- Attach the side rails to the landing board, leaving a 14-1/2″ gap between them.
- Create a reducer board (14-1/2″ x 2″) to control the hive entrance size.
Assembling the Brood Box
The brood box is where the queen lays eggs and the colony raises new bees.
- Cut four pieces of wood: two at 19-7/8″ x 9-5/8″ (front and back) and two at 16-1/4″ x 9-5/8″ (sides).
- Create hand holds by cutting shallow grooves on the outer faces of each piece.
- Assemble the box using glue and nails, ensuring square corners.
- Add a frame rest by nailing a 3/4″ x 3/8″ strip inside the front and back pieces, 5/8″ from the top edge.
Building Frames and Foundation
Frames provide structure for the bees to build comb.
- Cut top bars (19″ x 1-1/16″ x 7/8″), bottom bars (17-1/4″ x 3/4″ x 3/8″), and end bars (8-1/2″ x 1-3/8″ x 3/8″).
- Assemble the frames using glue and nails.
- Install foundation (wax or plastic) into each frame.
Creating Supers for Honey Storage
Supers are additional boxes placed on top of the brood box for honey storage.
- Follow the same process as the brood box, but adjust the height to 6-5/8″ for medium supers or 5-11/16″ for shallow supers.
- Build frames to fit the super size.
Crafting the Inner and Outer Covers
The inner cover provides insulation, while the outer cover protects from the elements.
Inner Cover:
- Cut a piece of plywood to 20″ x 16-1/4″.
- Add a rim around the edge using 3/4″ x 3/8″ strips.
- Cut a 4″ hole in the center for ventilation and feeding.
Outer Cover:
- Create a flat top from plywood (23-1/4″ x 20″).
- Build a rim underneath with 2″ high sides.
- Cover the top with metal sheeting for weather protection.
Customizing Your Bee Hive
Now that you have the basic structure, let’s explore ways to enhance your hive’s functionality and longevity.
Adding Ventilation and Moisture Control
Proper ventilation is crucial for hive health. Consider these additions:
- Drill small holes in the upper corners of your brood box and supers.
- Install screened bottom boards for increased airflow.
- Use a quilt box above the inner cover to absorb excess moisture.
Painting and Weatherproofing Your Hive
Protect your hive from the elements:
- Sand all exterior surfaces smooth.
- Apply a primer suitable for exterior use.
- Paint with light-colored, non-toxic exterior paint.
- Consider using linseed oil on interior surfaces for natural protection.
Incorporating Pest Management Features
Defend your hive against common pests:
- Install entrance reducers to guard against mice and larger insects.
- Use screened bottom boards to help control varroa mites.
- Consider adding a slatted rack above the bottom board for improved brood rearing and pest control.
Setting Up Your Homemade Bee Hive
With your hive built and customized, it’s time to prepare for your bees.
Choosing the Perfect Location
Select a spot that provides:
- Morning sun and afternoon shade
- Protection from strong winds
- Easy access for you to work
- A clear flight path for bees
- Nearby water source
Preparing the Hive Stand
A sturdy stand keeps your hive off the ground:
- Build a simple stand using cement blocks or wooden pallets.
- Ensure the stand is level and stable.
- Consider using ant guards to prevent pest invasions.
Installing Bees in Your New Hive
When your bees arrive:
- Spray the package lightly with sugar water to calm them.
- Remove several frames from the center of your brood box.
- Gently shake the bees into the hive.
- Place the queen cage between two frames.
- Replace the removed frames carefully.
- Close up the hive and watch your new colony settle in.
Maintaining Your DIY Bee Hive
Regular maintenance ensures a healthy, productive hive.
Regular Inspections and Cleaning
Perform these tasks regularly:
- Check for signs of disease or pest infestation.
- Clean the bottom board of debris.
- Replace any damaged frames or equipment.
- Ensure the queen is present and laying eggs.
Seasonal Hive Management
Adapt your care routine to the seasons:
- Spring: Add supers, manage swarming behavior.
- Summer: Monitor honey production, harvest when ready.
- Fall: Prepare for winter, ensure adequate honey stores.
- Winter: Minimize disturbances, check food supplies.
Expanding Your Hive as the Colony Grows
As your colony thrives:
- Add supers when bees have filled 70-80% of the current box.
- Consider splitting strong colonies to prevent swarming.
- Rotate old comb out of the brood box annually.
Troubleshooting Common Issues with Homemade Hives
Even with careful construction, issues may arise. Here’s how to address them.
Addressing Construction Flaws
- Gaps or cracks: Seal with wood filler or additional wood pieces.
- Warped wood: Replace affected parts to ensure proper fit.
- Loose joints: Reinforce with additional nails or wood glue.
Dealing with Pest Infestations
- Small hive beetles: Use traps or maintain strong colonies.
- Varroa mites: Implement integrated pest management strategies.
- Wax moths: Keep colonies strong and remove excess comb.
Fixing Weather-Related Problems
- Leaks: Apply additional weatherproofing or replace damaged parts.
- Poor ventilation: Add more ventilation holes or use a screened bottom board.
- Overheating: Provide additional shade or ventilation in hot weather.
Advanced Hive-Making Techniques
As you gain experience, consider these advanced features for your hives.
Incorporating Observation Windows
- Cut a rectangular opening in one side of the brood box.
- Install a piece of clear plexiglass.
- Create a hinged wooden cover to protect the window when not in use.
Building Top Bar and Warre Hives
Top Bar Hive:
- Construct a long, horizontal box with sloping sides.
- Create top bars that rest on the upper edges of the box.
- Add a roof for weather protection.
Warre Hive:
- Build multiple square boxes of equal size.
- Create top bars or frames for each box.
- Stack boxes vertically, adding new ones to the bottom.
Creating Nucleus Hives for Colony Expansion
- Build a smaller version of your Langstroth hive, typically holding 5 frames.
- Use this for raising new queens or splitting colonies.
- Ensure proper ventilation and insulation for these smaller units.
Cost Comparison: DIY vs. Store-Bought Hives
Understanding the economics can help you make an informed decision.
Breaking Down the Expenses
DIY Hive Costs:
- Wood: $30-$50
- Hardware: $10-$20
- Paint and finishes: $15-$25
- Tools (if needed): $50-$100
Store-Bought Hive Costs:
- Basic Langstroth hive: $150-$300
- Premium or specialized hives: $300-$500+
Long-Term Benefits of Homemade Hives
- Cost savings on multiple hives
- Ability to repair and replace parts easily
- Customization options for your specific needs
- Deeper understanding of hive structure and bee behavior
Legal Considerations for Backyard Beekeeping
Before setting up your hive, ensure you’re complying with local regulations.
Understanding Local Regulations
- Check city or county ordinances regarding beekeeping.
- Review homeowners’ association rules if applicable.
- Familiarize yourself with state apiary laws and registration requirements.
Obtaining Necessary Permits
- Apply for any required beekeeping permits.
- Register your hive with local agricultural authorities if mandated.
- Consider beekeepers’ insurance for liability protection.
Final Checkpoint: Embracing the Rewarding Journey of Hive Making
Building your own bee hive is more than just a DIY project – it’s the beginning of an exciting journey into the world of beekeeping. By creating a home for these remarkable creatures, you’re not only setting yourself up for a fulfilling hobby but also playing a crucial role in supporting our ecosystem.
As you’ve learned, making a bee hive requires careful planning, the right materials, and attention to detail. But the rewards – from the satisfaction of crafting something with your own hands to the joy of watching your bee colony thrive – are immeasurable.
Remember, beekeeping is a continuous learning process. Don’t be discouraged if everything isn’t perfect from the start. Each challenge you encounter is an opportunity to grow your skills and deepen your understanding of these fascinating insects.
So, gather your tools, roll up your sleeves, and get ready to create a buzz in your backyard. Your homemade bee hive awaits, and with it, a sweet adventure in beekeeping. Happy building, and may your hives always be buzzing with activity!

